

Do you want to create a nonprofit donation form in WordPress? With just a little effort, you can quickly start accepting donations on your own WordPress site.
In this article, we’ll show you how to create a nonprofit donation form in WordPress.
Having an online donation form on your own WordPress site has many benefits:
- Easy to give – Your supporters are more likely to donate if it’s easy and quick.
- Simple to transfer – Payment solutions easily integrate into your site so you can accept donations.
- Seamless to connect – Easily customize form fields so you can get more details from your donors to stay in touch.
So, let’s get started.
Step 1: Create a Nonprofit Donation Form
The first thing you’ll need to do is install and activate the WPForms plugin. For more details, see this step by step guide on how to install a plugin in WordPress.
Next, go to WPForms » Add New to create a new form.
On the setup screen, name your form and select the Donation Form template.
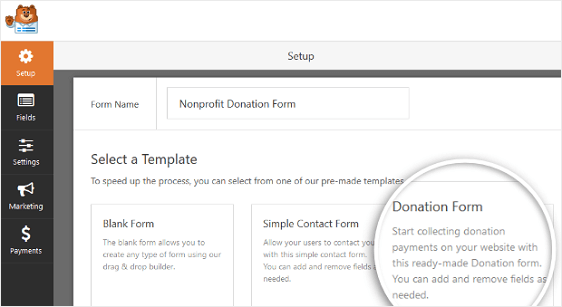
WPForms will create a donation form.
Step 2: Customize the Form Fields
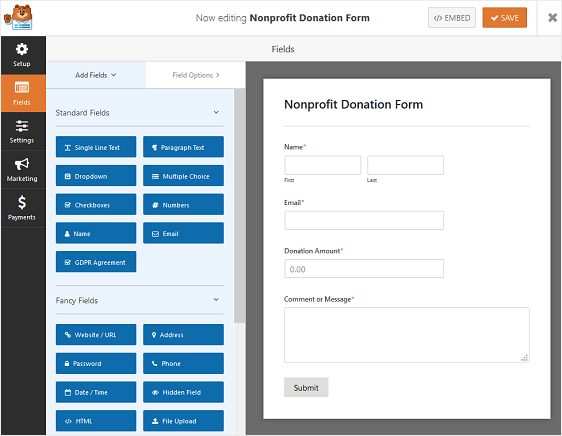
You’ll notice that your donation form has the following form fields:
- Name
- Donation Amount
- Comment or Message
You can add additional fields to your donation form by dragging them from the left hand panel to the right hand panel.
Then, click on the field to make any changes. You can also click on a form field and drag it to rearrange the order on your contact form.
Your donation form field is a Single Item field that gives users a chance to enter the amount they want to donate. You can also use multiple choice or dropdown fields instead.
In this example, we’ll show you how to add a multiple choice payment field that presents several donation amounts to choose from, while keeping the option to enter a different amount too.
To start, drag the Multiple Items form field, found under Payment Fields, to the right hand panel. We’ll place this new field above the Donation Amount field.
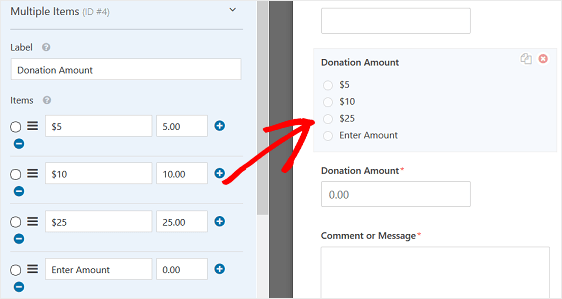
Next, click the form field to make changes:
- Change the label to something like “Donation Amount”
- Change each item to show a different donation amount
- Add another item and call it something like “Enter Amount”
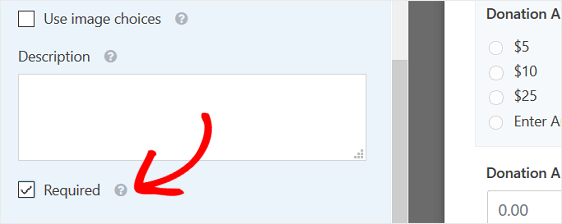
Now, scroll down and click the Required checkbox to be sure those filling out your donation form enter amounts before clicking submit.
The next thing you need to do is customize your donation form to display the Single Item form field when the multiple choice option Enter Amount is selected.
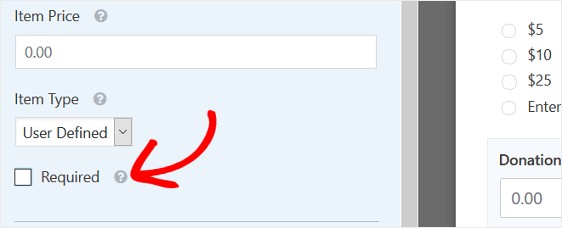
To start, click the “Donation Amount” form field to make changes.
Unclick the Required checkbox or users won’t be able to select the pre-defined donation amounts if that’s what they want to do.
Next, scroll to the dropdown menu labeled Conditionals. Select the checkbox Enable conditional logic.
Then, select the option to Show this field if Donation Amount is Enter Amount.
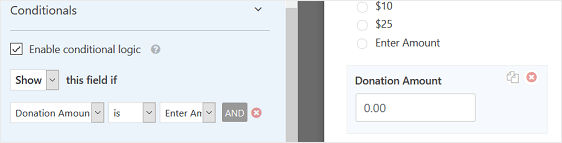
This way, anytime a site visitor wants to enter their own donation amount by selecting the Enter Amount multiple choice option, the Donation Amount form field will display.
Once you’re done customizing your form, click Save.
Now we’ll take a look at how to configure your nonprofit donation form settings.
Step 3: Configure Your Form’s General Settings
There are several settings to configure when creating a nonprofit donation form in WordPress. We’ll start with the general settings first.
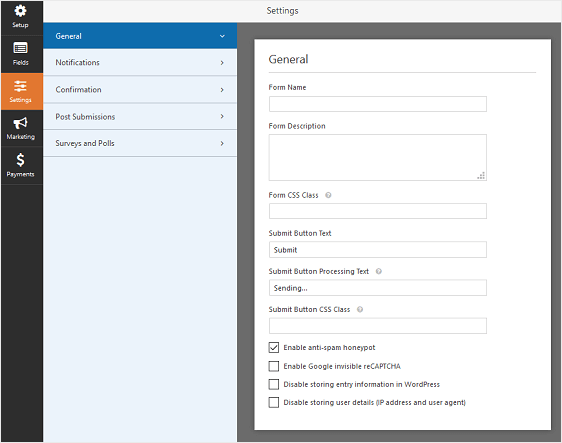
To start, go to Settings » General.
Here you can configure the following:
- Form Name. Rename your form if you want to.
- Form Description. Give your form a description.
- Submit Button Text. Customize the submit button copy.
- Spam Prevention. Enable the anti-spam honeypot feature to prevent spambots. This feature is automatically enabled on all WordPress forms. If you decide to use another form of spam prevention, just unclick this option.
- GDPR Enhancements. You can disable the storing of entry information and user details, such as IP addresses and user agents, in an effort to comply with GDPR requirements. In addition, check out our step by step instructions on how to add a GDPR agreement field to your simple contact form.
When you’re done, click Save.
Step 4: Configure Your Form’s Notifications
Notifications are a great way to send an email whenever a donation is made on your website.

In fact, unless you disable this feature, whenever someone makes a donation on your site, you’ll get a notification about it.
If you use smart tags, you can also send a notification to the site visitor when they make a donation, letting them know you received their donation and will be in contact shortly. This assures site visitors their forms have gone through properly.
For help with this step, check out our documentation on how to set up form notifications in WordPress.
And, if you want to send more than one email, read this article on how to create multiple form notifications in WordPress.
Lastly, if you want to keep branding across your notification emails consistent, you can check out this guide on adding a custom header to your email template.
Step 5: Configure Your Form’s Confirmations
Form confirmations are messages that display to site visitors once they submit a donation form on your website. They let people know that their donation has been received and offer you the chance to let them know the next steps.
WPForms has three confirmation types to choose from:
- Message. This is the default confirmation type in WPForms. When a site visitor makes a donation, a simple message confirmation will appear letting them know it was received. Look here for some great success messages to help boost customer happiness.
- Show Page. This confirmation type will take site visitors to a specific web page on your site thanking them for their donation. For help doing this, check out our tutorial on redirecting customers to a thank you page. In addition, be sure to check out our article on creating effective Thank You pages for boosting customer loyalty.
- Go to URL (Redirect). This option is used when you want to send site visitors to a different website.
Let’s see how to set up a simple form confirmation in WPForms so you can customize the message site visitors will see when they make a donation on your website.
To start, click on the Confirmation tab in the Form Editor under Settings.
Next, select the type of confirmation type you’d like to create. For this example, we’ll select Message.
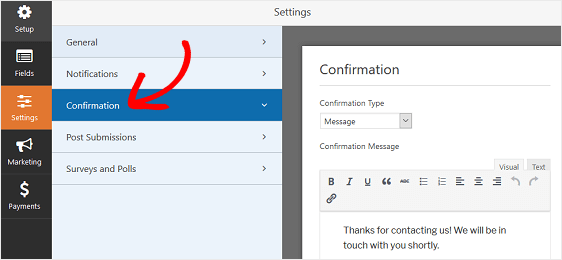
Then, customize the confirmation message to your liking, and click Save when you’re done.
For help with other confirmation types, see out documentation on setting up form confirmations.
Step 6: Configure Your Form’s Payment Settings
In order to accept donations, you’ll need to configure your payment settings.
WPForms integrates with both PayPal and Stripe for accepting payments.
To configure the payments settings on your donation form, you’ll first have to install and activate the right payment addon.
For easy step by step instructions, check out our tutorial on installing and using the PayPal addon. If you want to use Stripe, you’ll find similar instructions for installing and using the Stripe addon here.
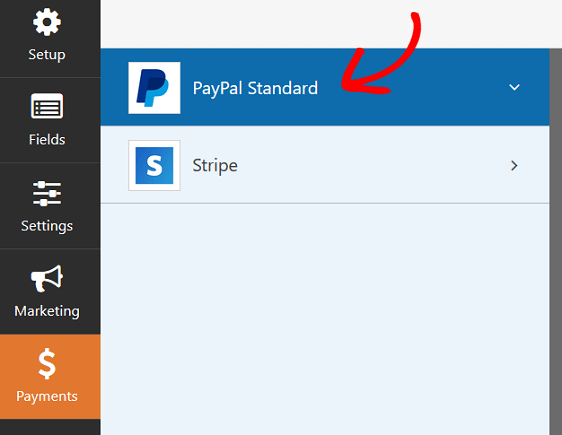
Once you’ve done that, click the Payments tab in the Form Editor.
In our example, we’ll set up PayPal to process donations.
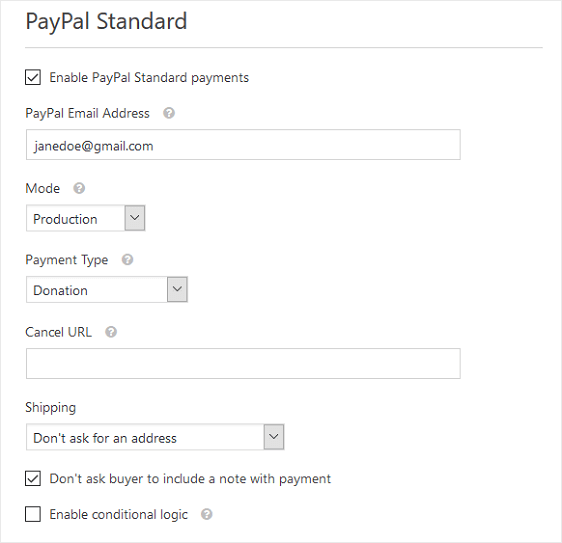
Here you’ll need to do the following:
- Click the checkbox enabling PayPal Standard payments on your donation form
- Enter the email address associated with your PayPal account
- Choose the Production mode, unless you want to test your form first, then choose Test/Sandbox. For help with testing your forms, check out how to test PayPal payments and how to test Stripe payments before accepting real payments on your site
- Select the Donation payment type
- Send site visitors to a certain URL if they don’t complete their PayPal donation
- Select your preferred shipping setting
- Decide whether to allow site visitors to include notes with payments
After you’re done configuring the payment settings, click Save to store your changes.
Be sure to check out our tutorial on allowing customers to choose their payment method if you want to offer more than one payment option.
Now you’re ready to add your contact form to your website.
Step 7: Add Your Nonprofit Donation Form to Your Website
After you’ve created your doantion form, you need to add it to your WordPress website.
WPForms allows you to add your forms to many locations on your website, including your blog posts, pages, and even sidebar widgets.
Let’s take a look at the most common post/page embed option.
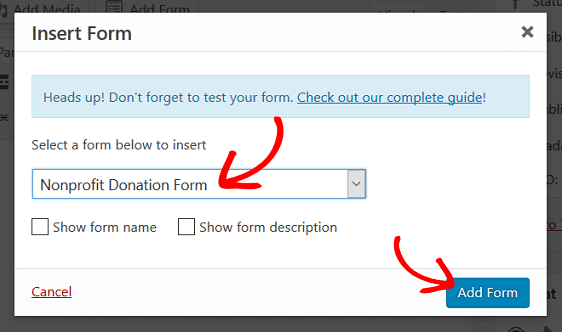
To start, create a new post or page in WordPress and then click on the Add Formbutton.
Next, select your donation form in the modal popup and click Add Form.
Then, publish your post or page so your donation form will appear on your website.

Keep In Touch With Donors
You can combine your donation forms with some popular email marketing services like:
This gives you the chance to you to add donors to your email list and keep them informed about your organization’s events.
If you want, you can even allow donors to make a donation while they’re filling out any other WordPress forms on your site. Read about how to add optional payment to your WordPress forms.
And there you have it! You now know how to create a nonprofit donation form in WordPress.
You may also want to check out these tactics to boost donation form conversions, or our tutorial on how to set up a volunteer application form.
So, what are you waiting for? Get started with the most powerful WordPress forms plugin today.
Source:


